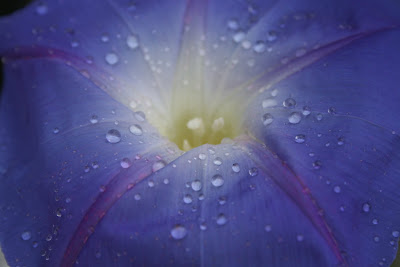
Water shows up in my photography as a natural extension of being drawn to it. There are so many ways that you can incorporate water into your photos. Here are a few ways I’ve done it.
1. Photograph in the rain, or just after it has rained. To shoot IN the rain, I use a large zip type bag that I have modified to protect my camera. I cut a hole large enough to fit the lens through. You’ll have to experiment to find something that fits your camera. I keep this in my camera bag, as well as a couple of unused, backup bags. Mostly, I shoot after the rain or in the mist. I love how water clings to things like grass and leaves. Flower petals transform with droplets on them. The colors are magnified and reflected. Drops hanging perilously can mirror their host. Even a good pass with the sprinkler or a misting water bottle can really bring out the color. Don’t despair, as I had, when it rained on my wedding day. The colors in the garden were so vibrant and amazing that in hindsight, I wouldn’t have had in any other way.
2. Photograph using water as a reflective source. Bodies of water reflect the blue sky and clouds. A calm surface can mirror things floating on it, like boats and buoys. Sometimes just changing your position, a few feet one way or the other, higher or lower, can capture something in the reflection that makes the photo much more than a boat on the water.
3. A while back I had an assignment in a photography class that was entitled: Studio in the Field. The point was to learn to create a scene with the items at hand, in your home, or on the fly. I looked around the house and found some colorful beads, put them in a while bowl, ran the water from the kitchen faucet, and started shooting. I played with the speed of the water and tossed the beads about for variation. Out of that came a series I’ve called the “Bubble Series” and it continues. I just did some the other night with some of my daughter’s marbles. Simple, everyday objects take on a whole different look underwater and when distorted by movement.
Though my series is entirely created, you can find this illusionary effect in nature, too. One of my favorite shots of recent years was this one. It’s a shot of an opened purple mussel shell, as well as the other shorefront debris, under the incoming tide.
4. Then there’s actually shooting underwater. I snorkel when we travel and on our last trip to Mexico, wanted to be able to do so. Professional grade underwater equipment is expensive. I was able to find the Olympus 1030 at a reasonable price (about $300 in 2008). Its 10mp camera that can handle the pressure to depths of 30 feet and is also so rugged you can drop it from a height of 6 ft without damaging it. It’s heavier than most point and shoot cameras, but I found it to be perfect for beach and theme park use, when you might be getting wet, and your regular camera couldn’t take being dowsed on the Canyon River Rapids, but you really want to get that shot of your mother in law getting soaked. 

5. Trying to get shots in aquariums never worked for me until I started putting my camera lens right up to the glass and shooting through. It eliminates the glare and reflection and lets you get the creature within.
Just about any time you get near water, you can find something to photograph.
Give it a try. It’s raining today where I am and I’m just itching to get off the computer and go out to shoot. If you’re a reader and get inspired, or just love shooting with water, I’d love to hear about it.


No comments:
Post a Comment